Step 1: Download the 32 Bit and 64 Bit Client from the following location.
http://www.oracle.com/technetwork/database/enterprise-edition/downloads/112010-win32soft-098987.html

Step 11: To complete either the 32-bit or 64-bit Oracle client installation processes make the following registry changes:
1. For both 32-bit and 64-bit installations, open up REGEDIT and make the following registry changes:
HKEY_LOCAL_MACHINE\Software\Microsoft\MSDTC\MTxOCI
OracleOciLib contains the value oci.dll
OracleSqlLib contains the value orasql11.dll (old value is SQLLib80.dll)
OracleXaLib contains the value oraclient11.dll (old value is xa80.dll)
2. For 64-bit installations:
HKEY_LOCAL_MACHINE\Software\Wow6432Node\Microsoft\MSDTC\MTxOCI
OracleOciLib contains the value oci.dll
OracleSqlLib contains the value orasql11.dll (old value is SQLLib80.dll)
OracleXaLib contains the value oraclient11.dll (old value is xa80.dll)


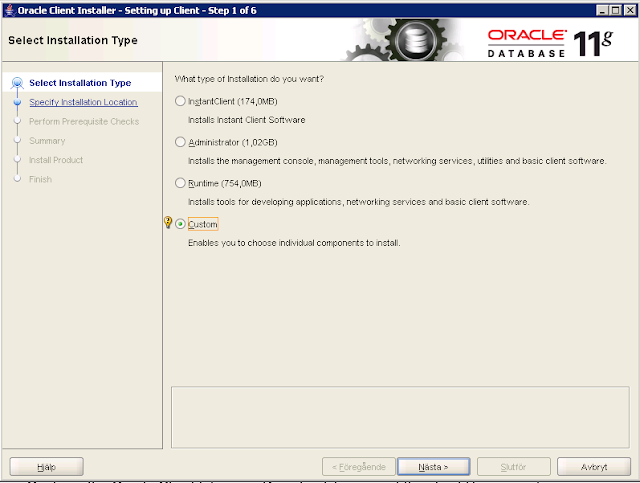
Step 2: Install 64Bit Version of the Client first and repeat the same Steps for 32 Bit Client.
Here I am only showing screenshots for 32 Bit installation.Select Custom as shown in the ScreenShot below.
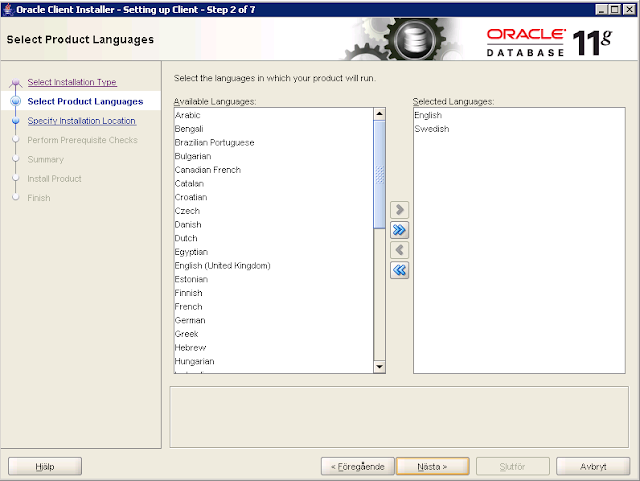
Step 3: Select the language you can to use in the Client tools.

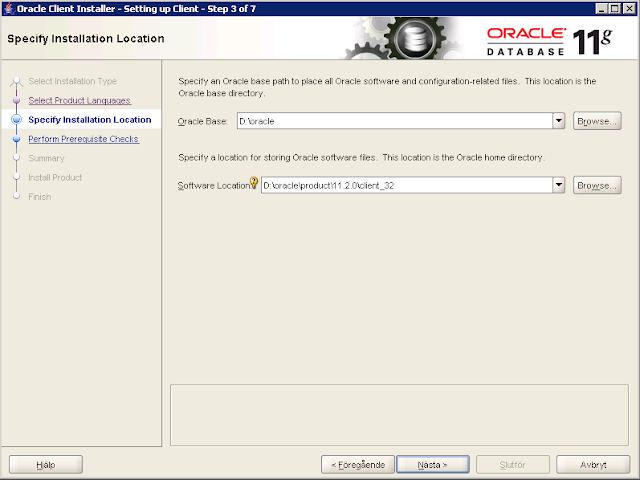
Step 4: Specify the path where you want to Install the Oracle Client. Here I have selected D:\Oracle . You should use same path for 64 Bit Client Installation also. I have shown a summary for 64 Bit Client in Step 7 so its easy to understand on how to configure 64 Bit Client.

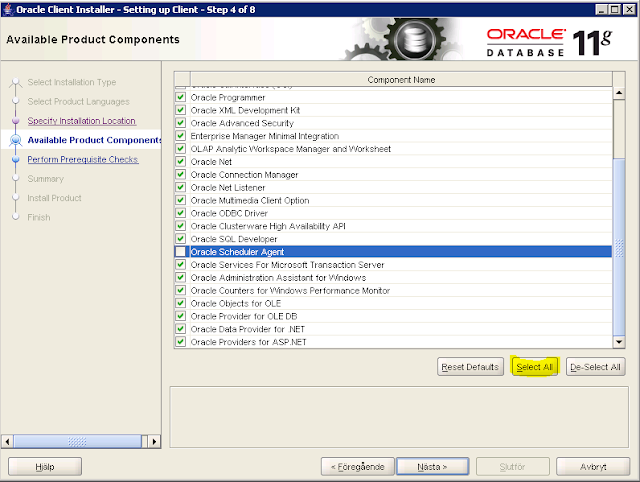
Step 5: Select all componenets expect Oracle Scheduler Agent.

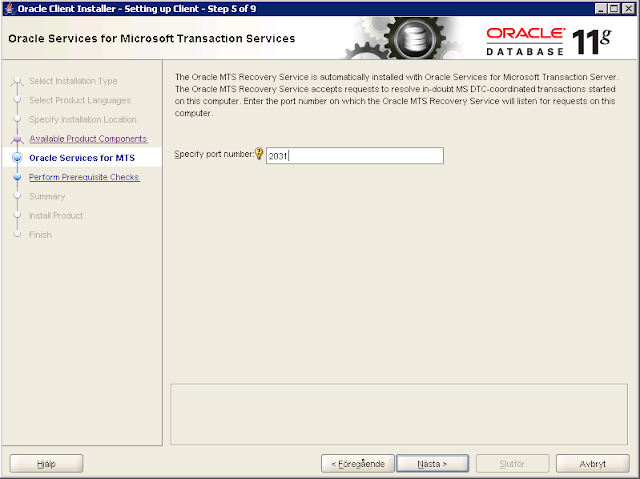
Step 6: Port No by default is 2030. Keep it the default one. I selected 2031 because I had installed wrong version of Oracle Client before which used up the Port 2030 :) .

Step 7: Here is the Summary of 64 Bit Client Installation.

Step 8: If you have already installed 64 Bit Client it will give an Error/Warning saying the Service already exist. Just Click Continue because this service is already created by the 64 Bit Client Installation.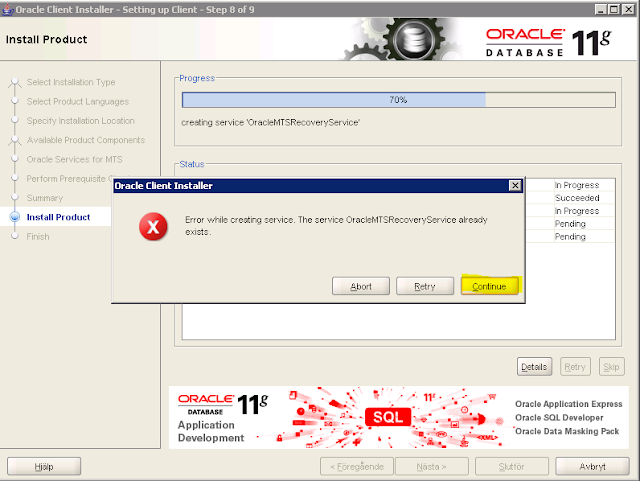

Step 9: For Listener just click Perform typical configuration and click Next.

Step 10: Finally it will finish and just Click End/Finish and the Oracle Client is Installed successfully.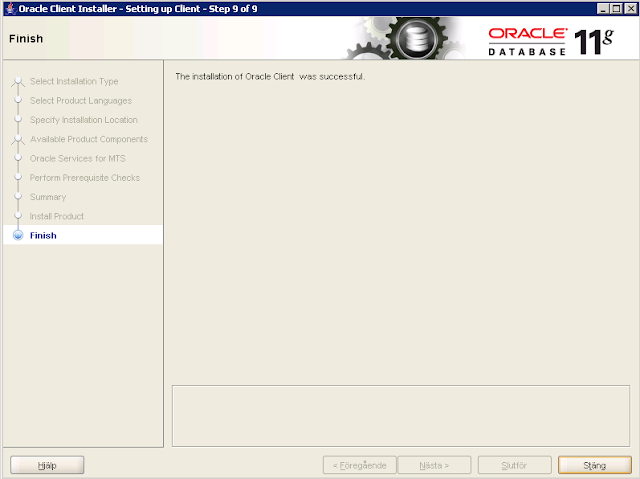

Step 11: To complete either the 32-bit or 64-bit Oracle client installation processes make the following registry changes:
1. For both 32-bit and 64-bit installations, open up REGEDIT and make the following registry changes:
HKEY_LOCAL_MACHINE\Software\Microsoft\MSDTC\MTxOCI
OracleOciLib contains the value oci.dll
OracleSqlLib contains the value orasql11.dll (old value is SQLLib80.dll)
OracleXaLib contains the value oraclient11.dll (old value is xa80.dll)
2. For 64-bit installations:
HKEY_LOCAL_MACHINE\Software\Wow6432Node\Microsoft\MSDTC\MTxOCI
OracleOciLib contains the value oci.dll
OracleSqlLib contains the value orasql11.dll (old value is SQLLib80.dll)
OracleXaLib contains the value oraclient11.dll (old value is xa80.dll)

Step 12: Configure the Oracle clients (both 32 and 64 bits) by
editing the files tnsnames.ora and sqlnet.ora.
Both files should be placed in the following Folders
D:\oracle\product\11.1.0\client_64\network\admin
D:\oracle\product\11.1.0\client_32\network\admin
Tnsnames.ora file should contain similar connection string as follow
AB10P =
(DESCRIPTION =
(ADDRESS_LIST =
(ADDRESS = (PROTOCOL = TCP)(HOST = 192.168.190.12)(PORT = 1527))
)
(CONNECT_DATA =
(SERVICE_NAME = AB10P .test.com)
)
)
Step 13: Use the "Oracle provider for OLE DB" from SSIS, don't use the "Microsoft Provider for Oracle" because a 64 bit version of it does not exist.
Step 13: Use the "Oracle provider for OLE DB" from SSIS, don't use the "Microsoft Provider for Oracle" because a 64 bit version of it does not exist.
Sample Connectionstring :
Provider=OraOLEDB.Oracle;Password=testPassword;Persist Security Info=True;User ID=User1;Data Source=
Tableprefix: Test1"."
Provider: Oracle Provider for OLE DB

